
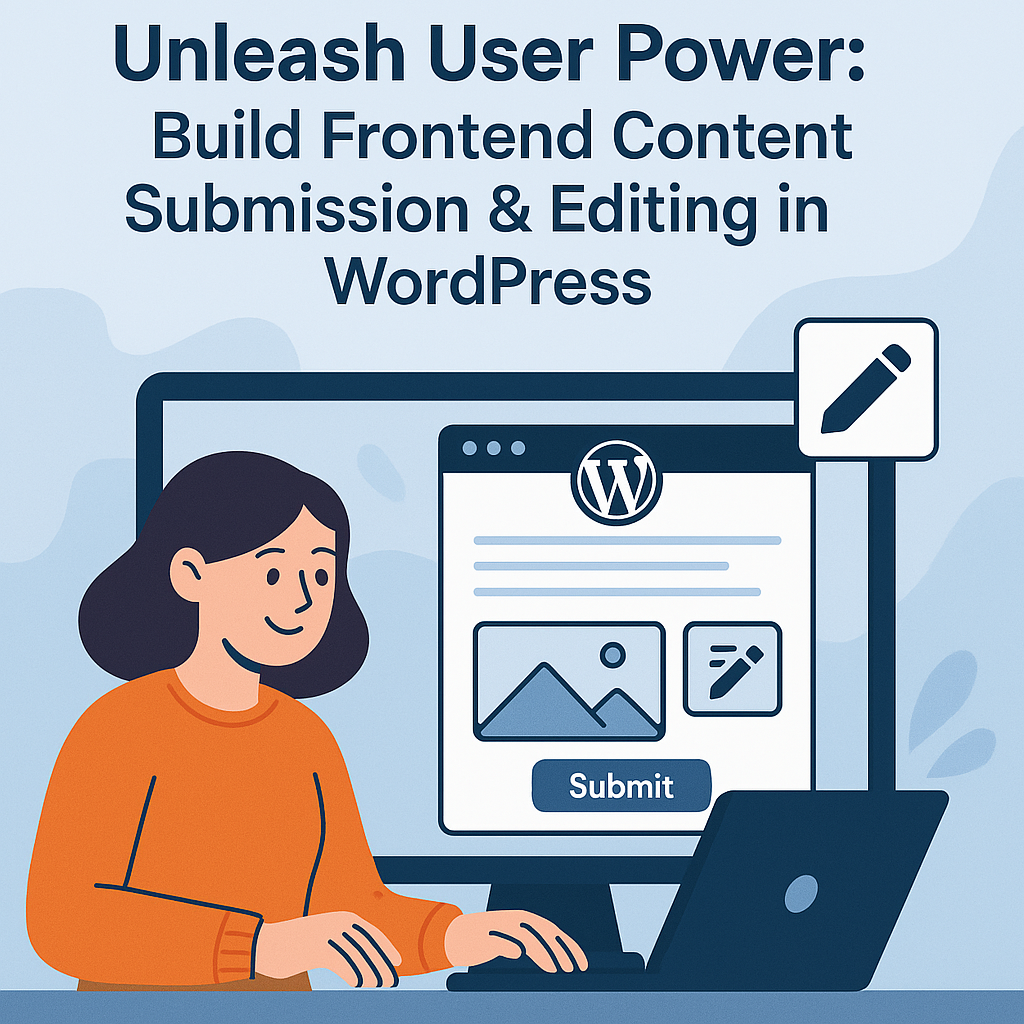
Unleash User Power: Build Frontend Content Submission & Editing in WordPress

Tired of herding your users into the often-intimidating WordPress backend just for them to submit a simple testimonial, update their profile, or add a quick event? Imagine a world where your website's public-facing interface doubles as a clean, intuitive content creation hub. A place where your users can contribute, edit, and manage their content seamlessly, without ever seeing the WordPress admin dashboard.
This is the power of frontend content submission and editing, and it's a game-changer for user experience and site management.
In this comprehensive guide, we'll delve deep into the art of transforming your WordPress site into a dynamic platform where authenticated users can create and modify posts (or even custom post types) directly from the comfort of your beautifully designed frontend. We'll leverage the robust capabilities of PHP to handle the complex form processing and secure data saving, while simultaneously harnessing the elegance of CSS to craft a clean, intuitive, and perfectly branded editing interface.
You'll learn how to securely collect user input, seamlessly integrate it with WordPress's core content management functions, and present a polished experience that keeps your users engaged and your site streamlined. Whether you're aiming to facilitate guest blogging, manage a user-driven directory, enable client content updates, or simply provide a better profile editing experience, mastering frontend editing is an invaluable skill.
While this endeavor requires a solid understanding of WordPress theme development, basic PHP, and CSS, the rewards are immense. We'll break down each step, providing clear explanations and, later, actionable code examples, ensuring you can confidently build a secure and highly functional frontend content system. So, let's ditch the backend clutter and empower your users to create directly on your terms!
Setting Up the Foundation (PHP)
Before we dive into the nitty-gritty of form processing and database interaction, we need to lay a solid groundwork for our frontend editing system. This involves deciding where our editing interface will live on your WordPress site, ensuring the right users have the necessary permissions, and sketching out the initial structure of our submission form. PHP will be our primary tool here, orchestrating the creation of our dedicated editor page and preparing it for user input.
Choosing a Page Template: The Canvas for Your Editor
Our frontend editor won't just appear out of thin air; it needs a designated home within your WordPress theme. The most straightforward approach is to create a custom page template. This template will house all the HTML for our submission form and the PHP logic to display it, allowing you to create a dedicated "Submit Content" or "Edit My Profile" page that uses this custom layout.
Enabling User Capabilities: Who Gets to Edit?
WordPress operates on a robust system of user roles and capabilities. Before any user can submit or edit content from the frontend, we need to ensure they possess the necessary permissions. While default roles like "Editor" or "Author" might already have edit_posts capability, you might want to grant specific custom capabilities, especially if you're dealing with custom post types or want fine-grained control over who can do what. This step is crucial for security and managing your site's content workflow.
The Frontend Form Structure: Building the User Interface
With our page template ready and user permissions in place, the next logical step is to construct the actual HTML form that your users will interact with. This form will be the heart of our frontend editor, allowing users to input their content. We'll start with the essential fields like the post title and the main content area (which we'll want to make a rich text editor), and discuss how to include crucial hidden fields for security and to identify whether a post is being created or edited. This basic HTML structure, powered by PHP for dynamic values, forms the bedrock upon which our editing experience will be built.
Handling Content Submission (PHP)
With the foundational page template and form structure in place, we now move to the core of our frontend editing system: processing the data submitted by your users. This is where PHP truly shines, taking the raw input from the form, validating it for security, and then interacting directly with the WordPress database to create new posts or update existing ones. This part is critical, as it defines what happens when a user clicks that "Submit" button.
Processing the Form Submission: The Trigger
The first step in handling user input is detecting when the form has actually been submitted. PHP provides simple mechanisms for this, primarily by checking the presence of $_POST variables. Once detected, we'll funnel this incoming data through a series of crucial checks before we even think about touching the database.
Security Measures: Nonce Verification – Your First Line of Defense
Security is paramount when allowing frontend submissions. A significant threat is Cross-Site Request Forgery (CSRF), where malicious requests can be sent without the user's knowledge. WordPress provides a powerful security feature called "nonce" (number once) to combat this. We'll learn how to implement these unique, time-sensitive tokens in our form and verify them on submission, ensuring that only legitimate requests from your site are processed. This is a non-negotiable step for any secure frontend form.
Capability Checks: Ensuring Authorized Actions
Beyond nonce verification, it's essential to confirm that the current user has the necessary permissions to perform the requested action (e.g., create a new post, edit a specific type of content). Relying solely on the frontend display is insufficient; malicious users could try to bypass client-side restrictions. PHP's current_user_can() function provides a robust way to verify a user's capabilities on the server-side, preventing unauthorized content manipulation.
Sanitizing User Input: Cleaning Up for Safety
User-submitted data, by its nature, cannot be trusted directly. Malicious code (like JavaScript) or improperly formatted content can lead to Cross-Site Scripting (XSS) vulnerabilities or break your site's layout. Sanitization is the process of cleaning and filtering this input to ensure it's safe and adheres to expected formats before it ever touches your database. We'll explore WordPress-specific sanitization functions that are tailored for different types of data, from plain text to rich HTML.
Inserting New Posts (wp_insert_post()): Bringing Content to Life
Once the input is validated and sanitized, we're ready to create new content. WordPress offers a powerful and flexible function, wp_insert_post(), specifically designed for this purpose. We'll construct an associative array of post data (title, content, status, author, etc.) and pass it to this function. This is where you decide if the submitted content goes straight to "publish," needs "pending" review, or starts as a "draft." We'll also cover how to programmatically assign categories and tags.
Updating Existing Posts (wp_update_post()): Enabling Edits
For our frontend editor to be truly useful, users must also be able to modify content they've already submitted. This requires a slight variation in our PHP logic. We'll learn how to detect if the form submission is for an existing post (usually via a hidden post ID) and then use wp_update_post() instead of wp_insert_post(). This function takes the same type of arguments but updates an existing post based on its ID, ensuring seamless revisions. Crucially, we'll also need to consider how to pre-fill the form fields with the existing post's data in Part 4.
Handling Featured Images (Optional but common): Visual Appeal
Many content types benefit from a featured image. We'll briefly touch upon how to allow users to upload an image from the frontend and securely attach it as the featured image to their post. This involves using WordPress's media handling functions to manage the upload process.
Feedback Messages: Guiding the User
Finally, after processing the submission, it's vital to provide clear feedback to the user. Did their submission go through successfully? Were there errors? PHP allows us to redirect the user back to the form page (or a confirmation page) with status messages, which we can then retrieve and display to inform them of the outcome. This enhances the user experience by keeping them informed.
Read also Building a Custom Landing Page Template in WordPress with PHP, HTML & CSS https://cases.media/article/building-a-custom-landing-page-template-in-wordpress-with-php-html-and-css
Populating the Form for Editing (PHP)
A truly effective frontend editing system isn't just about submitting new content; it's equally about allowing users to seamlessly modify their existing work. This means when a user navigates to the editing page for a particular post, the form fields should already be pre-filled with the post's current title, content, categories, and any other relevant data. This significantly improves the user experience by providing a clear starting point for their edits. In this section, we'll focus on the PHP logic required to fetch this data and dynamically inject it into our frontend form.
Detecting Edit Mode: Knowing When to Pre-fill
The first step in populating the form is determining whether the user intends to create a new post or edit an existing one. This is typically handled by checking for a specific parameter in the URL, such as an edit_id query variable containing the ID of the post to be edited. Your PHP script will look for this indicator to switch from "new post" mode to "edit post" mode.
Let's start by defining variables to hold our post data. We'll set default empty values for a new post, then override them if we detect an edit request.
<?php
// Initialize variables for post data
$post_id = 0;
$post_title = '';
$post_content = '';
$post_categories = array();
$edit_mode = false;
$edit_error = '';
// Check if we are in edit mode
if ( isset( $_GET['edit_id'] ) && is_numeric( $_GET['edit_id'] ) ) {
$post_id = intval( $_GET['edit_id'] ); // Sanitize the ID
$edit_mode = true;
}
?>
Retrieving Post Data: Fetching the Content
Once we confirm that an edit is requested and we have the post ID, PHP will reach into the WordPress database to retrieve all the relevant information about that specific post. The versatile get_post() function is our go-to for fetching the entire post object, which contains everything from the title and content to its status and author ID.
Crucially, when implementing an editing feature, security must remain paramount. It's not enough to just retrieve the post; we must also perform a robust ownership validation. This means checking if the currently logged-in user is indeed the author of the post they are attempting to edit. While administrators might have broader editing rights, for a user-facing frontend editor, ensuring users can only modify their own content is a fundamental security practice. We'll demonstrate how to perform this vital check, gracefully handling cases where a user attempts to edit content they don't own.
<?php
if ( $edit_mode ) {
$current_user_id = get_current_user_id();
$post = get_post( $post_id );
// Basic validation: Check if post exists and if the current user can edit it
if ( ! $post ) {
$edit_error = 'Post not found.';
$edit_mode = false; // Revert to new post mode or show error
} elseif ( $post->post_author != $current_user_id && ! current_user_can( 'edit_others_posts' ) ) {
// If not the author AND not someone who can edit others' posts (like an admin)
$edit_error = 'You are not authorized to edit this post.';
$edit_mode = false; // Revert to new post mode or show error
} else {
// Post exists and user is authorized, populate variables
$post_title = esc_attr( $post->post_title ); // Escape for HTML attribute
$post_content = apply_filters( 'the_content', $post->post_content ); // Apply filters for editor
$post_categories = wp_get_post_categories( $post_id, array( 'fields' => 'ids' ) ); // Get category IDs
// You might also retrieve other meta data here, e.g.,
// $custom_field_value = get_post_meta( $post_id, 'my_custom_field', true );
}
}
?>
Populating Form Fields: Displaying the Existing Content
With the post data securely retrieved and validated, the final step is to dynamically insert this information into the corresponding HTML form fields. For basic text inputs like the title, this is a straightforward echo of the post's property. For the main content area, which will likely be a rich text editor, we'll use WordPress's powerful wp_editor() function. This function not only renders a full-featured WYSIWYG editor but also automatically pre-fills it with the given content, providing a familiar and functional editing experience for your users. We'll also cover how to pre-select existing categories, tags, and other metadata within your form.
Now, let's integrate these PHP variables into your HTML form (which would typically be in page-frontend-editor.php):
<div class="frontend-editor-container">
<?php if ( $edit_error ) : ?>
<p class="error-message"><?php echo $edit_error; ?></p>
<?php endif; ?>
<form method="post" action="">
<?php wp_nonce_field( 'frontend_post_submission', 'frontend_post_nonce' ); ?>
<input type="hidden" name="post_id" value="<?php echo esc_attr( $post_id ); ?>">
<input type="hidden" name="action" value="frontend_submit_post">
<p>
<label for="post_title">Title:</label>
<input type="text" name="post_title" id="post_title" value="<?php echo esc_attr( $post_title ); ?>" required>
</p>
<p>
<label for="post_content">Content:</label>
<?php
// Use wp_editor for the main content area
$editor_settings = array(
'textarea_name' => 'post_content',
'textarea_rows' => 15,
'media_buttons' => true, // Allow media uploads
'quicktags' => false,
);
wp_editor( $post_content, 'post_content_editor', $editor_settings );
?>
</p>
<p>
<label for="post_categories">Categories:</label>
<?php
// Display categories as checkboxes, pre-selecting existing ones
$categories = get_categories( array( 'hide_empty' => 0 ) );
foreach ( $categories as $category ) {
$checked = in_array( $category->term_id, $post_categories ) ? 'checked' : '';
echo '<input type="checkbox" name="post_categories[]" value="' . esc_attr( $category->term_id ) . '" ' . $checked . '> ' . esc_html( $category->name ) . '<br>';
}
?>
</p>
<p>
<input type="submit" value="<?php echo $edit_mode ? 'Update Post' : 'Submit New Post'; ?>" class="submit-button">
</p>
</form>
</div>
Styling the Frontend Editor (CSS)
A functional frontend editor is great, but a beautiful and intuitive one is even better. This is where CSS comes into play, transforming our raw HTML form into a polished user interface that seamlessly integrates with your website's overall design. By applying targeted styles, we can enhance readability, improve usability, and provide a visually appealing experience for your content creators.
Enqueuing Custom Styles: Keeping Things Organized
To keep your code clean and your site performant, it's best practice to load your custom CSS stylesheet only when and where it's needed – in this case, specifically on your frontend editor page. We'll use WordPress's wp_enqueue_style() function, typically within your functions.php file, to load a dedicated stylesheet for our frontend form.
First, create a new CSS file in your theme's directory, for example, your-theme/css/frontend-editor.css.
Then, add the following to your functions.php file:
<?php
/**
* Enqueue frontend editor specific styles.
*/
function mytheme_frontend_editor_styles() {
// Check if we are on the page that uses the frontend editor template
// Replace 'frontend-editor-page' with the slug of your actual page
if ( is_page( 'frontend-editor-page' ) || ( isset( $_GET['edit_id'] ) && is_numeric( $_GET['edit_id'] ) ) ) {
wp_enqueue_style(
'mytheme-frontend-editor-style',
get_template_directory_uri() . '/css/frontend-editor.css',
array(), // Dependencies (e.g., array('dashicons') if you use them)
filemtime( get_template_directory() . '/css/frontend-editor.css' ) // Versioning based on file modification time
);
}
}
add_action( 'wp_enqueue_scripts', 'mytheme_frontend_editor_styles' );
?>
Explanation:
is_page('frontend-editor-page'): This conditional tag ensures our styles are only loaded on the page where our frontend editor template is assigned. Remember to replace 'frontend-editor-page' with the actual slug of the page you create in WordPress for your editor.
(isset($_GET['edit_id']) && is_numeric($_GET['edit_id'])): This ensures the styles also load when a user is in "edit mode" via the URL parameter.
get_template_directory_uri() . '/css/frontend-editor.css': This correctly points to the location of your CSS file.
filemtime(...): This is a great way to automatically version your stylesheet, ensuring that browser caches are busted whenever you update the file.
Basic Form Layout: Making it Readable and Usable
Let's apply some fundamental CSS to give our form a clean, structured appearance. We'll style the overall container, labels, and input fields for better readability and a more professional look.
Add the following to your frontend-editor.css file:
/* Overall container for the frontend editor */
.frontend-editor-container {
max-width: 800px;
margin: 40px auto;
padding: 30px;
background-color: #ffffff;
border-radius: 8px;
box-shadow: 0 4px 15px rgba(0, 0, 0, 0.1);
font-family: 'Arial', sans-serif;
color: #333;
}
/* Headings within the editor */
.frontend-editor-container h1,
.frontend-editor-container h2 {
color: #2c3e50;
text-align: center;
margin-bottom: 30px;
}
/* Styling for form paragraphs and labels */
.frontend-editor-container p {
margin-bottom: 15px;
}
.frontend-editor-container label {
display: block; /* Make labels appear on their own line */
font-weight: bold;
margin-bottom: 8px;
color: #555;
font-size: 1.05em;
}
/* Styling for text input fields and textareas */
.frontend-editor-container input[type="text"],
.frontend-editor-container textarea {
width: 100%;
padding: 12px 15px;
border: 1px solid #ddd;
border-radius: 5px;
font-size: 1em;
box-sizing: border-box; /* Include padding in element's total width */
transition: border-color 0.3s ease, box-shadow 0.3s ease;
}
.frontend-editor-container input[type="text"]:focus,
.frontend-editor-container textarea:focus {
border-color: #007bff;
box-shadow: 0 0 5px rgba(0, 123, 255, 0.3);
outline: none; /* Remove default outline */
}
/* Checkbox styling for categories */
.frontend-editor-container input[type="checkbox"] {
margin-right: 8px;
vertical-align: middle;
}
.frontend-editor-container label + input[type="checkbox"] {
display: inline-block; /* Keep checkboxes next to their labels */
margin-left: 0;
}
WYSIWYG Editor Styling: Integrating TinyMCE
When using wp_editor(), WordPress generates a TinyMCE instance within an iframe. Styling the content inside this iframe directly from your main stylesheet can be tricky due to browser security restrictions (same-origin policy). However, you can often provide a custom stylesheet specifically for the TinyMCE editor's content.
While directly styling the editor's toolbar and outer elements is handled by the WordPress admin CSS or your theme's general styles, you can inform TinyMCE to load an additional stylesheet for the content area it displays.
Add this to your functions.php:
<?php
/**
* Add custom stylesheet to TinyMCE editor content.
*/
function mytheme_add_editor_styles() {
add_editor_style( 'css/frontend-editor-content.css' );
}
add_action( 'admin_init', 'mytheme_add_editor_styles' );
?>
Create a new file your-theme/css/frontend-editor-content.css. This file will apply styles within the visual editor's content area, giving authors a more accurate preview of their content's final look.
/* Styles for the content *inside* the TinyMCE editor */
body#tinymce {
font-family: 'Arial', sans-serif;
color: #333;
line-height: 1.6;
padding: 20px;
}
h1, h2, h3, h4, h5, h6 {
color: #2c3e50;
margin-top: 1.5em;
margin-bottom: 0.5em;
}
/* Example: Basic paragraph styling within the editor */
p {
margin-bottom: 1em;
}
/* You can add more specific styles here that reflect your theme's frontend styles */
Button Styling: Making the Call to Action Pop
The submit button is crucial. We want it to be clearly visible and inviting, indicating its purpose.
Add the following to your frontend-editor.css file:
/* Styling for the submit button */
.frontend-editor-container .submit-button {
display: block; /* Make it a block element to take full width */
width: 100%; /* Adjust as needed, or make it inline-block for fitting content */
padding: 15px 25px;
background-color: #007bff;
color: #ffffff;
border: none;
border-radius: 5px;
font-size: 1.15em;
font-weight: bold;
cursor: pointer;
transition: background-color 0.3s ease, transform 0.2s ease;
margin-top: 30px;
}
.frontend-editor-container .submit-button:hover,
.frontend-editor-container .submit-button:focus {
background-color: #0056b3;
transform: translateY(-2px);
box-shadow: 0 4px 10px rgba(0, 0, 0, 0.15);
outline: none;
}
Feedback Message Styling: Clear Communication
It's vital to provide clear visual feedback to users after they submit the form. Success messages should be encouraging, and error messages should stand out to draw attention to problems.
Add the following to your frontend-editor.css file:
/* Styles for success and error messages */
.success-message {
background-color: #d4edda;
color: #155724;
border: 1px solid #c3e6cb;
padding: 15px;
margin-bottom: 20px;
border-radius: 5px;
text-align: center;
font-weight: bold;
}
.error-message {
background-color: #f8d7da;
color: #721c24;
border: 1px solid #f5c6cb;
padding: 15px;
margin-bottom: 20px;
border-radius: 5px;
text-align: center;
font-weight: bold;
}
<?php
// At the top of your page-frontend-editor.php, after PHP processing:
if ( isset( $_GET['status'] ) ) {
if ( $_GET['status'] === 'success' ) {
echo '<p class="success-message">Your post has been submitted successfully!</p>';
} elseif ( $_GET['status'] === 'error' ) {
echo '<p class="error-message">There was an error submitting your post. Please try again.</p>';
if ( isset( $_GET['msg'] ) ) {
echo '<p class="error-message">' . esc_html( $_GET['msg'] ) . '</p>'; // Display specific error if passed
}
}
}
?>
Responsive Design Considerations: Adapting to All Screens
Ensuring your frontend editor looks good and is usable on all device sizes, from large desktops to small smartphones, is crucial. Basic responsiveness can be achieved with a few media queries.
Add the following to your frontend-editor.css file:
/* Responsive adjustments */
@media (max-width: 768px) {
.frontend-editor-container {
margin: 20px auto;
padding: 20px;
box-shadow: none; /* Reduce shadow on smaller screens */
border-radius: 0; /* Remove border-radius on smaller screens */
}
.frontend-editor-container h1,
.frontend-editor-container h2 {
font-size: 1.8em;
margin-bottom: 20px;
}
.frontend-editor-container .submit-button {
padding: 12px 20px;
font-size: 1em;
}
}
@media (max-width: 480px) {
.frontend-editor-container {
padding: 15px;
}
.frontend-editor-container label {
font-size: 0.95em;
}
.frontend-editor-container input[type="text"],
.frontend-editor-container textarea {
padding: 10px 12px;
font-size: 0.95em;
}
}
With these CSS rules, your frontend content submission and editing form will not only be fully functional but also visually appealing and adaptable across various devices, providing a seamless experience for your users.
Ready to explore how to add even more complexity and features to this system, such as custom fields or AJAX submissions?
Advanced Considerations & Next Steps (PHP & CSS)
You've now built a solid foundation for frontend content submission and editing in WordPress. You can capture user input, create and update posts, and style the interface. However, the world of WordPress development is vast, and many projects demand more nuanced control and extended functionality. In this section, we'll explore several advanced topics, hinting at the PHP and CSS techniques you'd employ to take your frontend editor to the next level.
Custom Post Types and Taxonomies: Beyond Standard Posts
While our examples have focused on standard WordPress 'posts', the real power of frontend editing often lies in its application to Custom Post Types (CPTs). Whether you're managing 'Products', 'Events', 'Listings', or 'Portfolios', the principles remain largely the same, but the implementation requires targeting these specific types. Similarly, incorporating Custom Taxonomies (like 'Brands' for products or 'Event Types' for events) into your frontend forms allows users to categorize their content precisely.
What to consider (Code Concept):
PHP: When calling wp_insert_post() or wp_update_post(), you'd simply change the 'post_type' argument in your $post_data array to your CPT's slug (e.g., 'product', 'event'). For custom taxonomies, you'd use wp_set_object_terms() to assign terms from form input.
CSS: Your existing CSS should largely adapt, but you might want to add specific styles for CPT-related fields or unique taxonomy displays if you introduce them.
Custom Fields (Meta Boxes): Adding Richer Data
Most advanced content types require more than just a title and content. Custom Fields (also known as post meta) allow you to store additional, structured data associated with a post – like a product's price, an event's date and time, or an author's contact information. Integrating these into your frontend editor empowers users to submit comprehensive data without touching the backend.
What to consider (Code Concept):
PHP:
Form HTML: Add new input fields (text, number, date picker, etc.) to your form with unique name attributes (e.g., name="my_custom_field").
Saving: After wp_insert_post() or wp_update_post(), use update_post_meta($post_id, 'my_custom_field_key', sanitize_text_field($_POST['my_custom_field'])) to save the data.
Populating: When in edit mode, retrieve existing custom field data using get_post_meta($post_id, 'my_custom_field_key', true) and pre-fill the form field.
CSS: Style these new input types (e.g., input[type="date"], custom select dropdowns) to match your overall form design.
Validation (Client-side & Server-side): Ensuring Data Integrity
While our previous section touched on server-side sanitization, validation is a distinct and crucial step. Validation ensures that the data submitted meets specific rules (e.g., a required field is filled, an email address is in the correct format, a number is within a certain range). Implementing both client-side (JavaScript) and server-side (PHP) validation provides a robust user experience and strong data integrity.
What to consider (Code Concept):
PHP (Server-side): Before calling wp_insert_post() or wp_update_post(), add conditional checks (e.g., if ( empty($_POST['post_title']) ) { // handle error }). If validation fails, store error messages and prevent post insertion/update, displaying the errors back to the user.
CSS: Define styles for .validation-error classes or highlight invalid fields with a red border (border: 1px solid red;), and display error messages in an attention-grabbing way.
User Notifications: Keeping Everyone Informed
For a collaborative environment or for administrative oversight, sending notifications after a successful submission or when a post enters a 'pending review' status is highly beneficial. This keeps relevant parties (the author, administrators, editors) informed about content changes.
What to consider (Code Concept):
PHP: Use wp_mail() after wp_insert_post() or wp_update_post(). You can hook into WordPress actions like save_post to trigger emails. Customize the email subject and body dynamically with post data.
CSS: While you don't directly apply CSS to the email within your WordPress theme's CSS, remember that well-formatted HTML emails often require inline CSS or specific email templating practices for consistent rendering across clients.
Deletion/Drafting: Empowering User Control
To give users full control over their submitted content, allowing them to delete their own posts or change their status to 'draft' directly from the frontend is a powerful feature. This requires adding specific buttons or links and handling the corresponding PHP actions.
What to consider (Code Concept):
PHP:
Link/Button: Add a "Delete" or "Save as Draft" button/link to your frontend display of submitted posts, passing the post_id and a new nonce.
Processing: Handle a new $_POST action (e.g., delete_frontend_post) or $_GET action. Use wp_delete_post() to move a post to trash or wp_update_post(array('ID' => $post_id, 'post_status' => 'draft')) to change its status. Crucially, verify user capabilities and ownership for deletion.
CSS: Style the delete/draft buttons distinctively (e.g., a red button for delete) and add confirmation pop-ups with JavaScript for a better UX.
Further Enhancements: Pushing the Boundaries
The possibilities for extending your frontend editor are nearly endless. Consider these ideas for a truly robust system:
AJAX Submission: Instead of a full page reload, use JavaScript and AJAX to submit the form in the background. This provides a much smoother, more responsive user experience, especially for larger forms or when providing immediate feedback.
PHP: Register an AJAX action using wp_ajax_{action} and wp_ajax_nopriv_{action}.
CSS: Provide visual feedback like loading spinners or dynamic success/error messages without page refresh.
Progress Bars/Multi-Step Forms: For very long forms, breaking them into multiple steps with a progress indicator can significantly reduce user fatigue.
PHP: Use sessions or hidden fields to pass data between steps.
CSS: Style the progress bar and transitions between form steps.
Frontend Media Library Access: Allow users to browse and select existing images from their media library, not just upload new ones.
PHP: Integrate with WordPress's media uploader JavaScript API.
CSS: Style the media library modal to blend with your frontend design.
By exploring these advanced concepts, you can transform a basic frontend editor into a sophisticated, tailored content management solution that perfectly fits your website's unique needs and provides an unparalleled experience for your users.
Convenient hosting for your WordPress sites
Looking for good hosting for your WordPress sites? Pay attention to Host4Biz. It is a reliable hosting with modern servers in Europe and a Ukrainian team.
And with the promo code MYHOST10 you will get a 10% discount on your first payment. To do this, register here and enter the code before paying.
Note: affiliate links included
Conclusion
You've embarked on a comprehensive journey, transforming your WordPress site from a backend-centric content hub into a dynamic, user-friendly frontend publishing platform. We started by understanding the "why" behind frontend editing – enhancing user experience, bolstering security, and streamlining content workflows.
We then laid the crucial PHP foundation, setting up a custom page template and ensuring proper user capabilities. We dove deep into handling submissions, meticulously covering nonce verification, capability checks, and the critical processes of input sanitization, ultimately using wp_insert_post() for new content and wp_update_post() for edits. The importance of secure handling of featured images and providing clear user feedback was also highlighted.
Next, we tackled the challenge of populating forms for editing, demonstrating how PHP efficiently retrieves and pre-fills content from existing posts, complete with robust ownership validation for security. Finally, we brought our editor to life with CSS, enqueuing custom styles, crafting a clean layout for forms and buttons, and ensuring responsiveness across devices. We also touched upon styling the TinyMCE editor itself, providing a consistent visual experience.
You now possess the knowledge and code examples to:
- Create a dedicated frontend page for content submission and editing.
- Securely handle form data with nonces and capability checks.
- Insert and update WordPress posts or custom post types programmatically.
- Pre-fill forms with existing post data for seamless editing.
- Style your frontend editor to match your site's brand and provide an excellent user experience.
Remember, the principles you've learned for standard posts are highly adaptable to custom post types and taxonomies. The concepts of custom fields, robust validation, user notifications, and advanced features like AJAX submission represent the next frontiers in building truly sophisticated frontend content solutions.
By implementing these techniques, you're not just building forms; you're empowering your users, simplifying your site's administration, and creating a more intuitive and engaging online presence. Keep experimenting, keep building, and continue to unlock the full potential of WordPress!


